The Garden, Second Year, 2013
Click here if you want to start back in 2012 for the very beginning of the project.
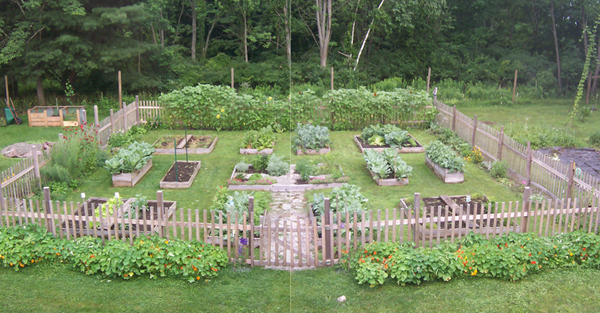
The garden had a nice winter sleep and then I got cracking again in the spring of 2013. Here’s a shot of the potager in front of the house in July of 2013:
The first thing I did as soon as the snow melted was to build a better composting operation. I found a three-bin plan on the web. The parts touching the ground are made out of black locust, a highly rot-resistant wood. The upright dividers are cedar, also rot-resistant. After all, composting is controlled rottage.
The components were bolted rather than screwed together to extend the life of the unit.

I added plywood “floors” to each bin, thinking they would rot and could be changed out every few years as necessary. Eventually, it got moveable slats for the front.

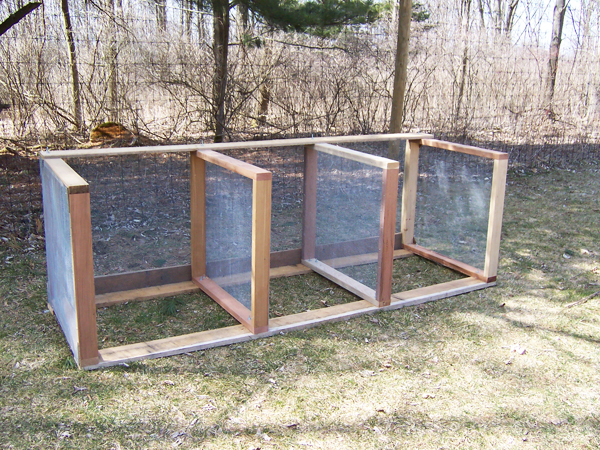
This is how the units were working eight months later (Dec 2013). I had the wire bin last year and kept that going too.

What had started out conceptually as a central masonry pad for a pavilion (with a little pergola) didn’t work out. Instead, I decided to make it an herb bed with some old standbys (thyme, rosemary-in-a-pot, oregano) and some novelties (stevia, wormwood) and one novelty vegetable (a cardoon).

I planted a couple of artichokes in the right side-bed just to see what they would do. This region is not regarded as prime artichoke country. They came on nicely, though, as you’ll see.

By May, the Arugula was ready to eat. Yay!

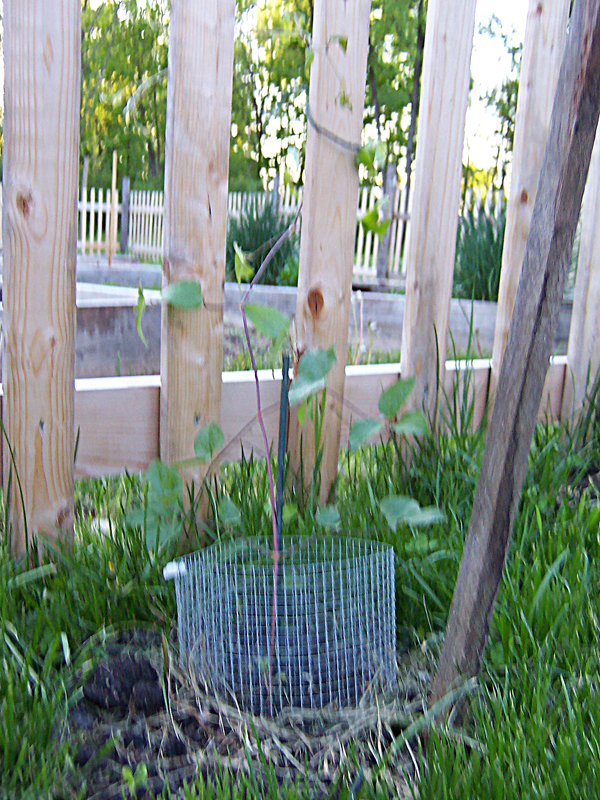
I ordered a couple of blight-resistant American chestnut trees from St Lawrence Nursery (real cold-hardy stock). Planted in April (brrrrr), this one was doing nicely by late May. Hardware cloth guard is to keep mice from chewing on bark.

Got some clematis going on each side of the front garden gate. It’s a climber.
In keeping with last year’s scheme, I planted sunflowers all through the west inside bed of the garden. I had a load of leftover pea gravel from 2012 and laid it in a little trough under the fence line, with some janky pieces of slate on top to suppress weeds. I ended up doing that under the whole fence line all the way around. Ugh, lot of work.

This is how things were shaping up in mid-May.

In the meantime, I started to turn my attention to building a chicken house. I had help from my friend Mike Durkee on this. I was between open heart surgery (March) and spine surgery (July — bone spurs in neck vertebrae — aaarrgghhh). Kind of took the starch out of me. Here’s the “foundation.” underway. Sills are lag-screwed into posts set on concrete block.

Joists are hung between the sills and triangular braces installed to prevent racking.

Stud-walls are going up. This shot gives you a sense of the chicken house’s location, at the rear of my little orchard. Deer fence in background. The property is like a petting zoo, though we are literally off the last street in the village. The deer come right down into the village at night and munch on people’s foundation plantings — and anything else they can get their lips around. Note nice growth of 2nd year fruit trees: apples, cherries, pears.

Floor installed and painted with epoxy exterior deck paint to protect against rain during construction.

Rafters going up. Figuring out the cuts for the bird’s mouth joints was a killer. I don’t pretend to be anything but an amateur carpenter.
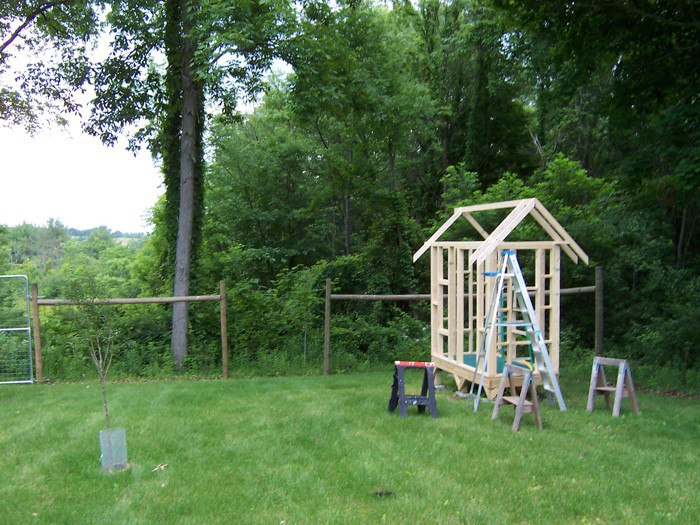
Roof installed. The ridge cap allows for a ventilation space at the peak.
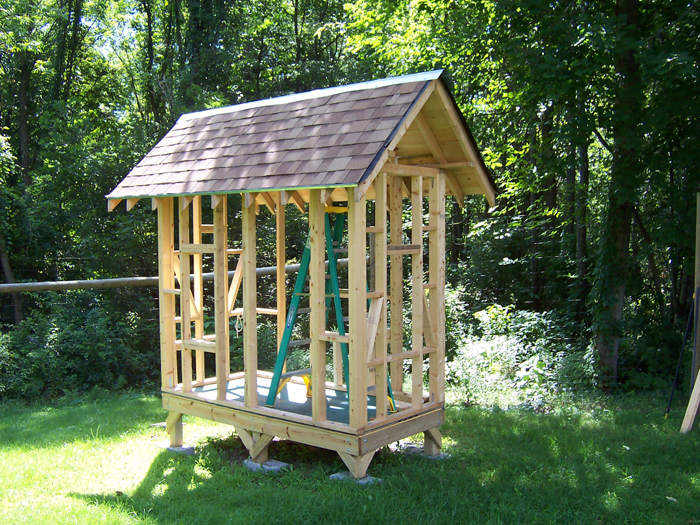
Siding goes on. The scheme is board-and-batten. Eventually this will be tricked out with gothic-style trimming.
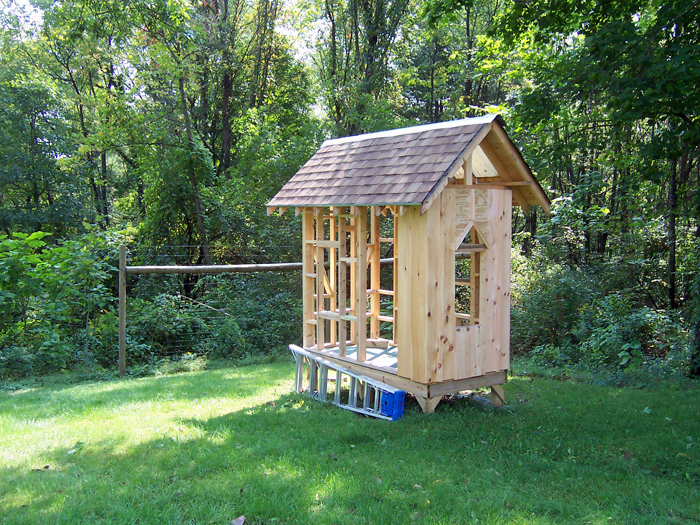
Okay, please don’t be shocked. This is as far as I got with the chicken house this year. Completion scheduled for May 2014 (chickens included). I had to turn my attention to another construction project in July.

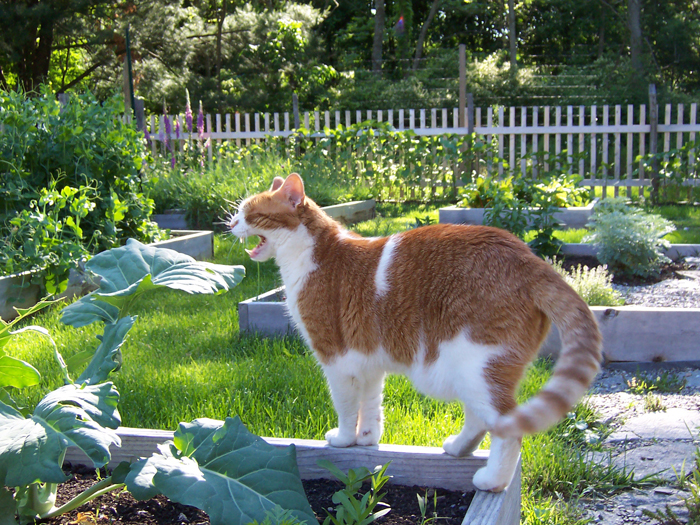
Scooter the cat (The Lion of Prospect Street –“Brrrrrowww ! !”) takes his leisure in the new herb bed. Digitalis (Foxglove) in rear. It’s June.

Watch out ye mouses and voles! Scooter is on the prowl!
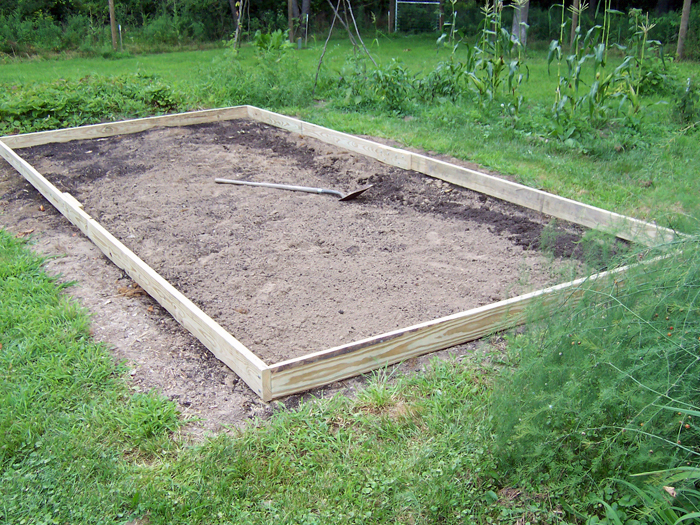
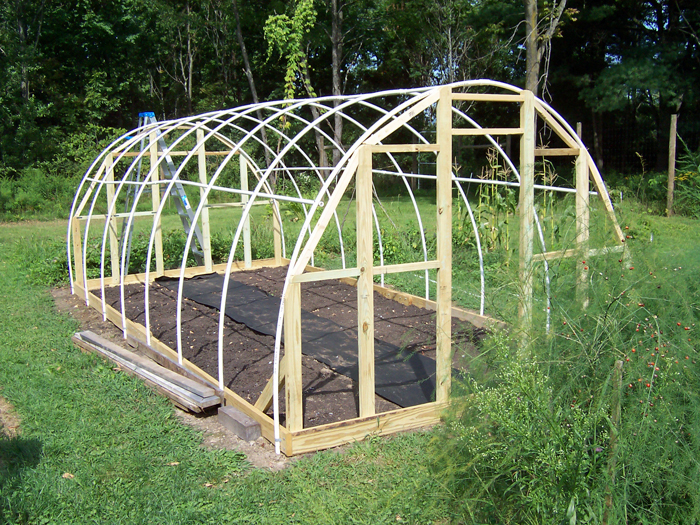
Wuh-Oh…! Here comes the hoop house. This is a plastic covered tunnel for extending the growing season on both ends, spring and fall. I had to get cracking on it. I got the plans off the internet (there are many such plans, all a little different). You can also buy kits from place like FarmTek, where I purchased some of the materials. Most of the materials just came from the local lumber yard / hardware store. The frame was constructed out of 3/4 inch PVC “schedule-40” plastic plumbing pipe, though I hear electrical conduit might be superior.

The foundation is 2 by 8 treated lumber. Research indicates that the chemicals used for treating the lumber do not really leach much. The site is on the right side of the potager garden. I temporarily got some corn and tomatoes and peppers going between the hoop house site and the raspberry bushes. At far end of the hoop house is a strawberry bed. Mike Durkee also helped with the construction of this thing. The dimensions are 10 feet wide by 21 feet long. The planting medium has already been prepared: a blend of topsoil and compost
There are eight hoops. Each is composed of two 10 foot lengths of PVC with 2-way joints and T-joints at the ends. The pipes are anchored into 36 inch lengths of 1/2 inch steel rebar driven 18 inches into the ground and then clamped onto the wooden foundation. That’s an asparagus bed in front. I let it grow out to establish the roots.

Here’s a view of how it related to the garden. Note nasturtiums established in garden front beds. The flowers and leaves are edible. Great in salads (and beautiful!)

Now you can see the end-walls going up. There is a ridge pole at the top of the arch, bolted in, and side braces too.
This shot tells a pretty complicated story. What seems like a simple job so far got more interesting. First of all, I had to figure out some way to connect these two rather incompatible materials: PVC pipe and lumber. Thank you Gawd, for duct tape. Then the whole interface had to be sealed with plastic to keep cold drafts out. Down below on the side. The metal channel on the horizontal wood support (bolted onto PVC pipe) is for “wiggle-wire” designed to hold the plastic cover on the whole thing. The bottom 36 inches can be rolled up to provide ventilation in spring.

The end walls have got their plastic covers on and we can now make a seal between the hoop cover and the end walls.
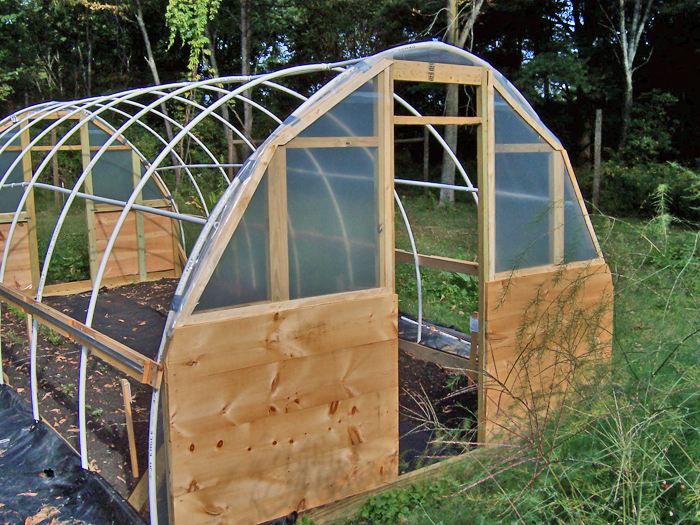
My friends Mike Durkee and CJ Lyttle are anchoring the plastic film in the wiggle-wires channel.

The whole shooting match is completed in October. It was a much more laborious task than I imagined at the start. A lot of the details for mounting and connecting various components had to be puzzled out as the process moved forward. The plastic cover is a special UV-decay-resistant film designed for this kind of structure. Its design life is about five years. It’ll cost about $150 (2013 dollars) to replace it when the time comes.

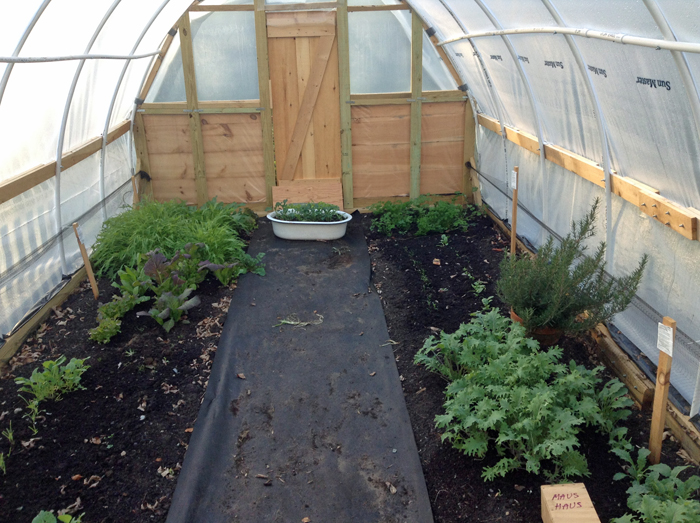
Here were the first plantings in the hoop house in October. It’s past the frost date for this climate zone. Things are coming along pretty well. A mouse and vole problem soon become apparent. The little buggers were tunneling in and nibbling the shoots off started plants. I set mousetraps and caught some practically every day. Of course, there are probably 10,000 more where they came from on my little three-acre parcel. Supposedly, the plants go dormant from December to late February. When the days get longer, and if the plants survive, they’ll start growing again. I can also get a head-start on spring garden plants in here. In December, I installed two brace posts on hoops 3 and 5 (not shown here) to support the structure under snow-loads. When all is said and done, I’d rather have a regular steel-and-glass greenhouse, but they’re pretty expensive and I have not succeeded to the Earldom yet.
Meanwhile, back in the potager. Here we are in August. Everything going pretty full blast. A fall crop of sugar snap peas just coming up. Sunflowers are thriving. Plenty of table greens going — enough to supply a restaurant, actually.

We had excessive rain in late June into July. One of the artichokes died, as did a number of parsley plants. But this baby made it and flourished.

The peach tree — one of two fruit trees that came with the property originally — bore prodigiously. For about two weeks it was peach-o-rama around here. I pruned the shit out of the tree back in late winter.

My second year Northern Spy apple trees both put out some apples. (two and five respectively). I was so awed by it that I let the darn things grow. Dumb. I should have pinched them off so the trees would put more of their energy in roots and limb structure. Oh well. Next year I’ll rest them. The tree that grew the most in two years was an Asian pear. That thing really took off, and it put out two deformed-looking pears — which nonetheless tasted real good!

And finally here we are in the fullness of September.

A couple of weeks before Christmas, 2013, the garden is going to sleep. Adventure awaits in the spring. New beds. Plum trees and more apples. I neglected to document the grapes, gooseberries, raspberries, hardy kiwis, and currents. Chickens coming. Will check in on them in 2014.
Merry Christmas to All


